
How to Make Your Own Painting Panels for Oil Painting
For years now, I’ve preferred painting on panels rather than stretched canvas.
There’s something about the solid surface that just works better for the way I paint. It doesn’t move underneath the brush, I can attack it a little more aggressively, and I can control exactly how much texture I want on the surface before I ever put down a stroke of oil paint. I also find them much easier to frame.
Of course, you can buy ready-made painting panels. But if you paint regularly, that can get expensive pretty quickly.
Here’s how to make your own batch of panels.
Why I Like Painting on Wood Panels
I paint primarily in oils, and I tend to work fairly quickly and directly.
For that style of painting, I really like having a rigid surface underneath me.
Canvas has a certain amount of give to it. A wood panel doesn't.
The brush reacts differently. Scraping paint away feels different. Thick strokes sit differently. Little bits of the ground can remain visible between brushstrokes without having the regular woven texture of canvas underneath everything.
More importantly, when I make my own panels I can control the surface.
I don't actually want mine perfectly smooth.
I deliberately leave some irregular brush texture in the gesso, then add a warm toned ground over the top. By the time I start painting, I'm working on a surface that already feels like mine.
That's really the point of this whole process.
What I Use to Make My Painting Panels
For my panels, I use:
1/4-inch birch plywood
A saw for cutting the panels
120-grit sandpaper
Windsor & Newton white acrylic gesso
A wide brush for applying the gesso
A rag
Gloves
My homemade oil-paint “ground” (sludge)
The exact brands aren't particularly sacred here. These are simply the materials I currently use and have become comfortable with.
Step 1: Cutting the Birch Plywood Into Painting Panels
I start with 24×48-inch sheets of 1/4-inch birch plywood.
Because most of my paintings are either 8×10 or 11×14 inches, I worked out a cutting plan that gives me eight painting panels from each sheet: four 11×14 panels and four 8×10 panels.
My saw blade has a 1/8-inch kerf, so that little bit of disappearing wood has to be taken into account when laying everything out.
I first divide the 48-inch length into four strips:
8 inches, 11 inches, 14 inches and 14 inches.
With the three 1/8-inch saw cuts between them, that uses 47 3/8 inches of the sheet and leaves roughly 5/8 inch at the end.
From there, the two 14×24-inch strips each produce two 11×14 panels.
The 8×24 and 11×24 strips are then cut to produce four 8×10 panels between them.
So one 24×48 sheet gives me:
Four 11×14 painting panels + four 8×10 painting panels = eight panels total.
Do that with six sheets and suddenly you've got 48 blank paintings staring at you, silently wondering what you're going to do with them.
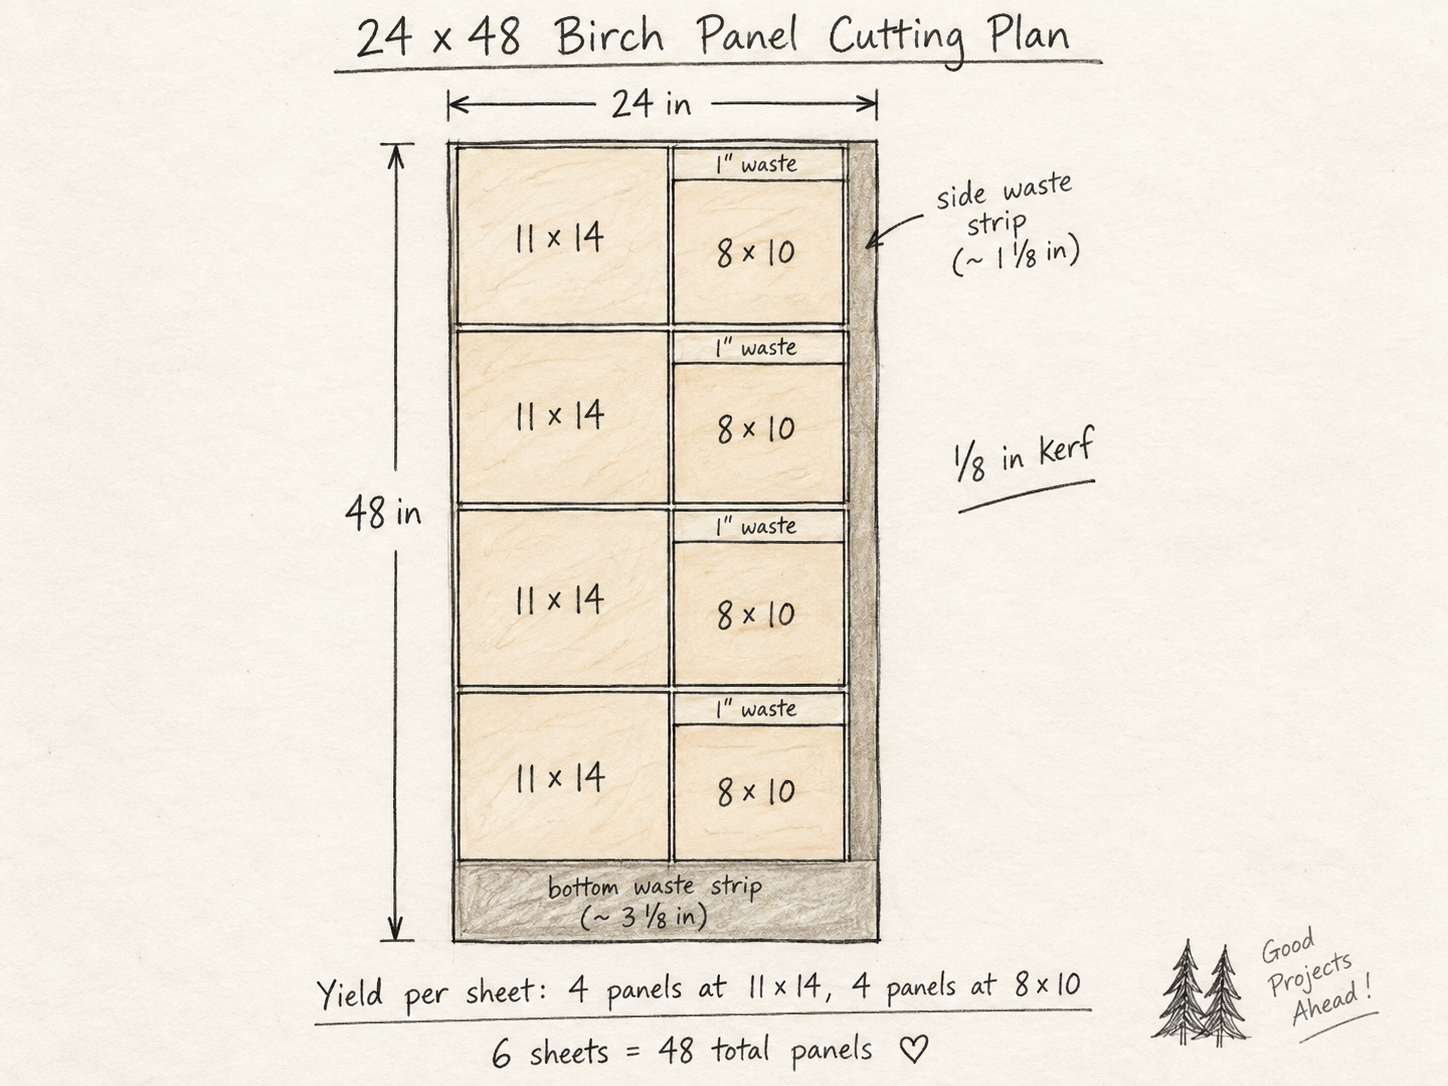
Cutting plan for 24 × 48 inch plywood sheet to create 8 painting panels.
Making several panels at once is definitely the way to go.
The setup and cleanup are the annoying parts. Once the saw is out and everything is measured, I would much rather make several months' worth of painting surfaces than repeat this process every time I need a new board.
Step 2: Sand the Edges
You'll usually have rough edges, little splinters and a corner that looks a bit “stabby.”
I use 120-grit sandpaper to clean everything up.
Once everything feels good, I remove the dust and bring the panels inside for priming.
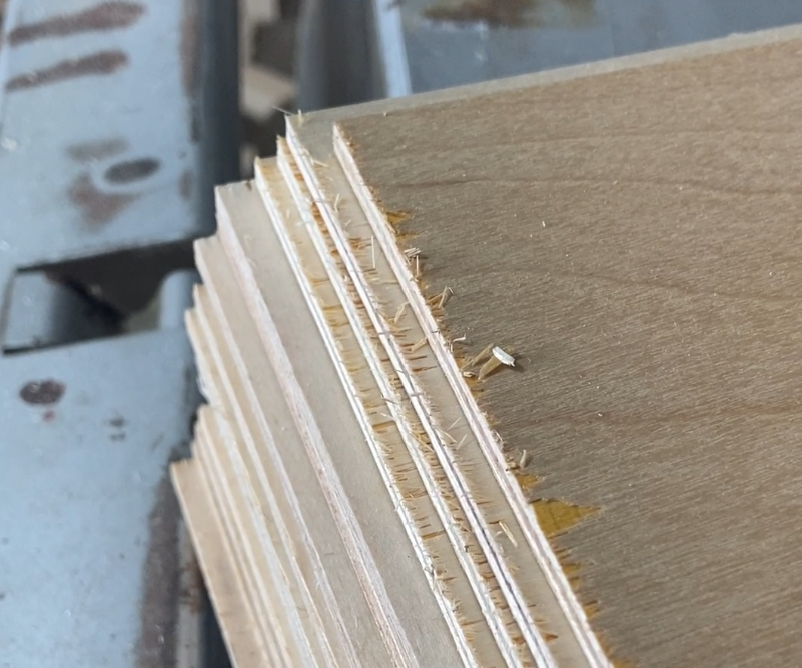
Plywood will leave you with some stabby edges.
Step 3: Apply the First Coat of Gesso
I use Windsor & Newton white acrylic gesso for my panels.
For the first coat, I'm simply trying to get good coverage.
I cover the entire surface and also work around the edges of the panel.
Toward the end of the coat, I lightly drag the brush across the panel so that the final brushstrokes are all running in roughly the same direction.
Then I leave it to dry.
Step 4: Add a Second Coat—and Some Texture
Once the first coat has dried, I apply a second coat of gesso.
Again, I'm making sure the entire surface is covered, but this time I don't want the gesso brushstrokes forming an obvious repetitive pattern underneath the painting.
So at the end of the second coat, I lightly feather random strokes across the surface in different directions to give it a subtle brushwork texture.
It's enough texture to give the surface some life and remove any sense of a repetitive texture or pattern.
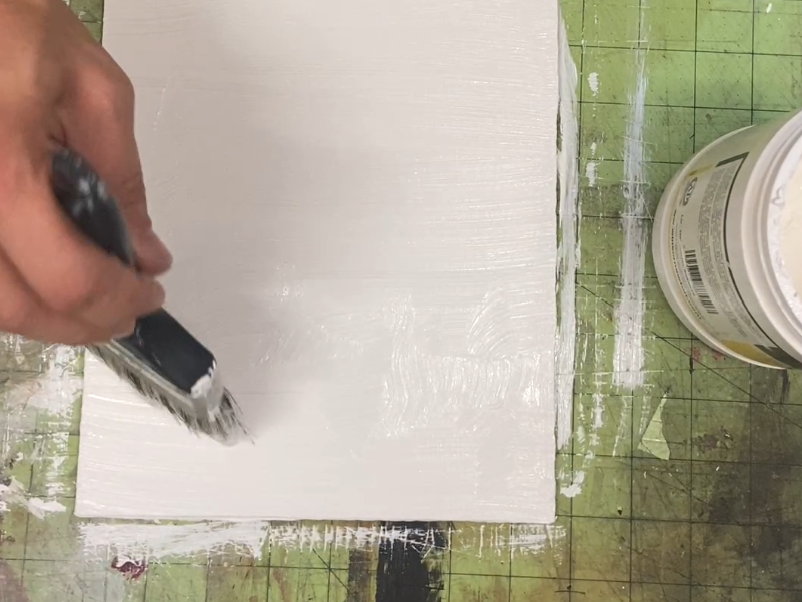
Add some texture with some random brush strokes to give the panel some interest.
Step 5: Enter the Pickle Jar
Now we get to the slightly weird part.
I have a pickle jar in my studio and it does not contain pickles.
Instead, whenever I finish a painting session and have a little oil paint left on my palette, some of that leftover paint eventually finds its way into this jar along with a little paint thinner.
Over time it becomes a questionable-looking sludge.
Because it's made from whatever colors I've been using, the exact color changes but I mainly try to keep it around a warm brown/blush color. This is what I refer to as “the ground".”
Step 6: Add a Warm Ground
Once the gesso is completely dry, I put on a pair of gloves, grab a rag and take a small amount of sludge from the pickle jar.
I rub it across the entire surface of the panel to stain it. The reason for this is explained in my earlier post.
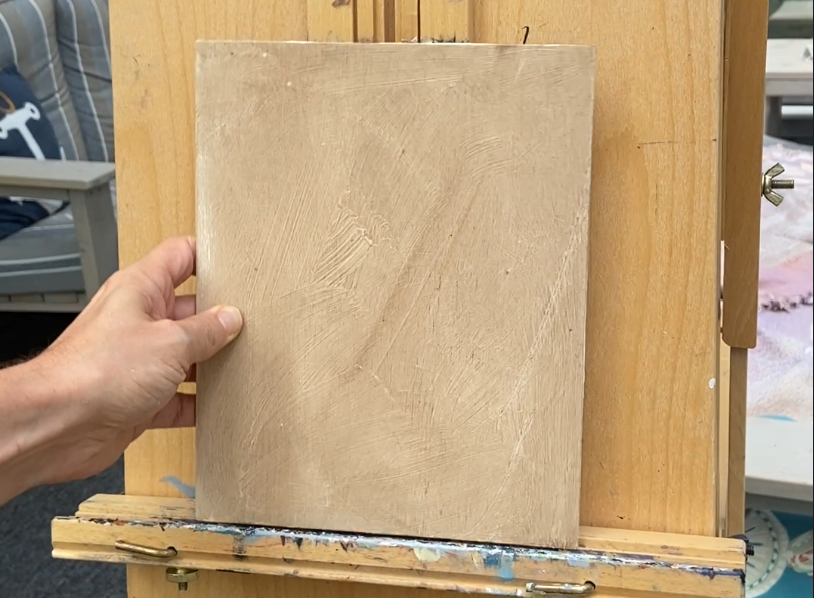
I work the mixture into the surface and wipe it around until the white gesso has been replaced by a thin, neutral color.
Then I leave the panel to dry completely.
This warm ground serves two purposes for me. First, I don't particularly enjoy starting a painting on a brilliant white surface. Second, because I paint fairly loosely, little pieces of that ground often remain visible between my final brushstrokes. Those tiny flashes of warm color help unify the finished painting.
It's one of those small things that probably doesn't look especially dramatic during preparation but makes a surprising difference to the end result.
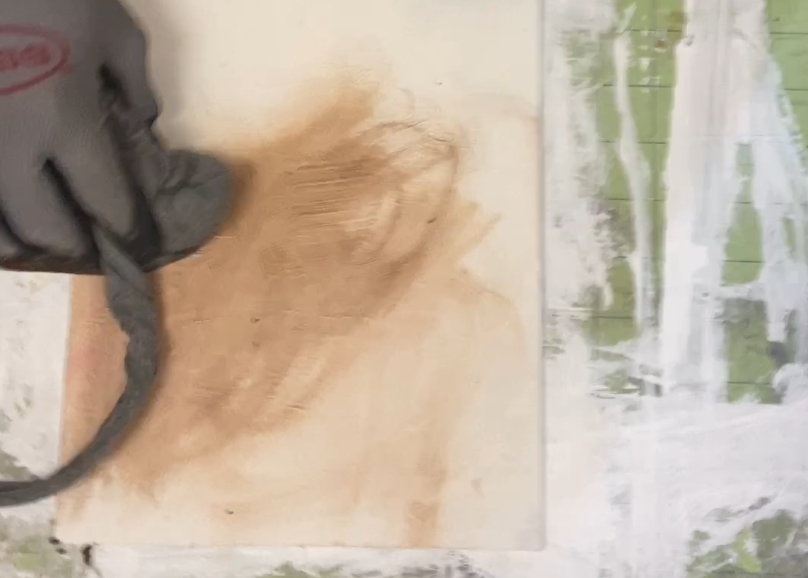
Stain the panel with the warm ground.
The Finished Painting Panel
Once the toned ground is completely dry, that's it, the panel is ready to paint on.
If you're an oil painter who has always bought prepared surfaces, making your own painting panels is worth experimenting with.
You don't have to copy my process exactly.
Try different surfaces. Change the amount of texture in the gesso. Experiment with different toned grounds.
Eventually you'll figure out what your brushes—and your paintings—seem to like.
You can see the finished oil paintings made on these panels in my Original Paintings collection.
